
This article tells you all about Discord and how to set it up to use in group rides and races in Zwift.
What is Discord and why would I want to use it?
Discord is a text, voice, and video chat application primarily aimed at videogamers. Here, we are mostly concerned with using the voice channels as a race radio, in the same way that professional cycling teams use radios during races. Here are some situations where having radio contact with your clubmates on a ride could be really useful:
- In a group training ride, the ride leader can let riders know what is coming next in the ride.
- For general social chat, as you would on a real-life ride.
- In a race, when working with other team mates to make tactical decisions.
- In a team time trial to call the changes and let the team captain know when you drop.
- To have an external DS who is watching the race and can advise individual racers of time gaps or moves from other racers.
Sounds cool – why can’t I just do this with Skype/Facetime/Zoom etc?
You could, but Discord is much better at this, and was designed from the ground up for gaming. It has the following features that make life a lot easier:
- Robust voice discrimination algorithms – this means that voice comes through a lot clearer over background noise (turbo, panting, music etc).
- Push-to-talk (PTT) – this means that others can only hear you when you hold down a specific key on your device. As soon as you release it, you are muted.
- The ability to set up multiple channels – for example, if we have three TTT teams, we would set up a channel for each of them.
- The ability to change everyone’s mic level as you hear them – no more asking other people to change their mic level, you can boost or cut their volume to suit you.
- The ability to run in the background, so you can run Zwift and Discord on the same device and they won’t interfere or grab each others key presses.
OK – How do I start?
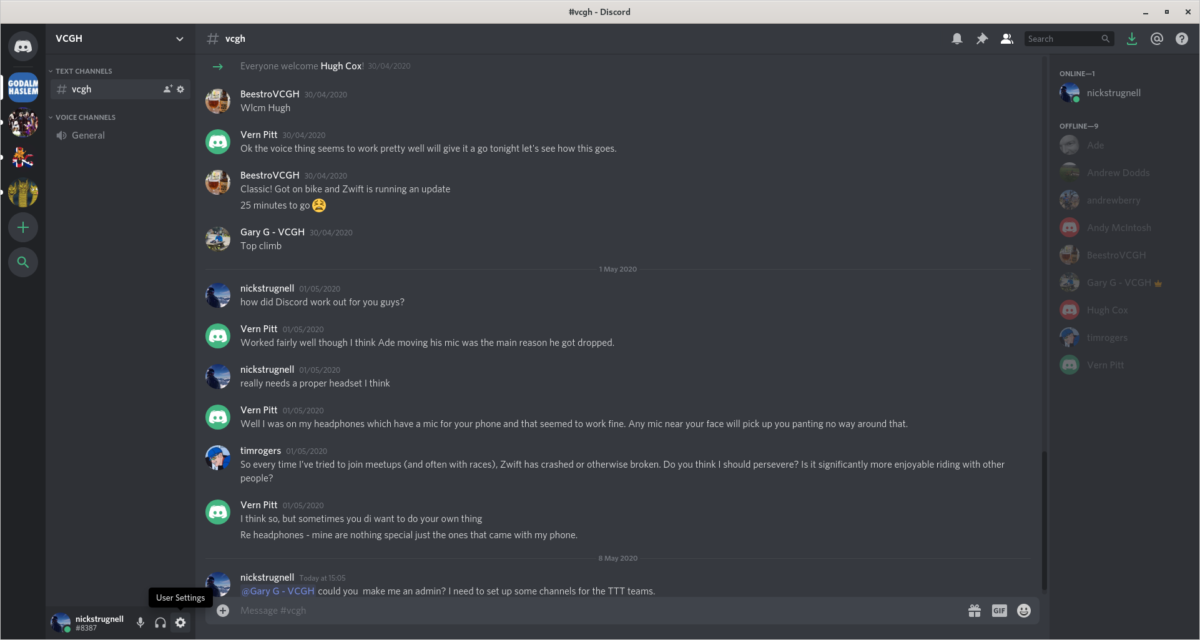
The first thing you need to do is to register for a Discord account. Just go here and register. Once you have registered click here it will add you to the VCGH server. A ‘server’ in discord speak is a private area that you can only access by invitation. You should see several channels on the left handside – these are subareas that you can join and use either for text chat (chat channels) or voice (voice channels). On the right handside is a list of members of the server, and you should also be able to see which ones are currently logged in (‘online’) and logged out (‘offline’)
Now at this point, you will see that you are actually on a web version of Discord. Now while you can run Discord in a web browser, it’s not really recommended as not all features are available. Instead you should download the Discord app to your local device.
For a PC or Mac you can download it from here
If you want to run discord on a mobile or tablet, it is available from the Google Playstore and Apple App Store.
If you are using Discord on a mobile or tablet device then it will NOT coexist with either Zwift or Zwift Companion if you want push-to-talk to work – for this it has to be running in the foreground.
Once you have downloaded and installed, just login with the same username and password that you set up when you created your account.
Great – it’s installed – what next?
If you are using a Mac or PC, the next thing is to setup your audio devices (microphone and headphone). Go to User Settings->Voice and Video and select your input (mic) and output (headphones) device as shown below. If you are not sure what to select, then just leave these on ‘Default’ and it will use whatever you have configured on your computer. You can test your mic by pressing the “Let’s Test” button which will record your voice and echo it back to you.


- A note on Mics and headphones.
You can use any kind of headphone with a built in mic, for example the earbuds that come with most mobile phones. You can also use a headset with a boom mic, such as this one: https://shop.nuance.co.uk/store/nuanceeu/en_GB/Content/pbPage.dragon-usb-headset For Zwift, you will probably want a lighter headset rather than something with large over-ear speakers.
Finally, for use in Zwift you probably want to configure Push-To-Talk (PTT). This is similar to using a 2-way radio – you can only talk when you are holding down a button. This means that your panting and moaning is not transmitted to the rest of your team!
To do this in the Mac or PC app, simply go to User Settings->Voice and Video as above and then select ‘Push to Talk’. You then need to assign the shortcut to active PTT by selecting ‘Start Recording’ in the box below. Then press the shortcut you want, and press stop recording. In future you will need to hold down this shortcut to be heard by others in your channel. A good one to use with Zwift would be the ‘#’ key as this is not used by Zwift at all and is easy to find.
On a mobile device or tablet, first join a voice channel (such as the General voice channel – it has a little mic signal next to it) by clicking on it. Then access options by clicking on the gear setting, then select input mode and select ‘Push to Talk’. This will show a large ‘Push to Talk’ button at the bottom of the screen that you must hold down if you want to be heard. This will NOT work if you are running Discord in background e.g. if you are running Zwift or Zwift Companion in the foreground. The following screengrabs should make this a little clearer (this is on an iPhone – it maybe a little different on an Android phone or tablet):


NB, you might have a headset that has a built-in mute button – many headsets designed for videoconferencing have this. If you are lucky enough to have one, you don’t need to mess around with PTT – just use the mute button the headset and unmute yourself whenever you want to talk – remember to mute again afterwards!

Leave a Reply